‏إظهار الرسائل ذات التسميات Marshmallow. إظهار كافة الرسائل

الأربعاء، 20 أبريل 2016

Build beautifully for Android Wear’s Round Screen using API 23’s -round identifier

Posted by Hoi Lam, Android Wear Developer Advocate


Android Wear is about choice. From the beginning, users could choose the style they wanted, including watches with circular screens. With Android Wear API 23, we have enabled even better developer support so that you can code delightful experiences backed by beautiful code. The key component of this is the new round resource identifier which helps you separate resource files such as layouts, dimens between round and square devices. In this blog post, I will lay out the options that developers have and why you should consider dimens.xml! In addition, I will outline how best to deal with devices which have a chin.


Getting started? Consider BoxInsetLayout!


If all your content can fit into a single square screen, use the BoxInsetLayout. This class has been included in the Wearable Support Library from the start and helps you put all the content into the middle square area of the circular screen and is ignored by square screens. For details on how to use the BoxInsetLayout, refer to the Use a Shape-Aware Layout section in our developer guide.


Without BoxInsetLayout
With BoxInsetLayout


Goodbye WatchViewStub, Hello layout-round!


Developers have been able to specify different layouts for square and round watches using WatchViewStub from the beginning. With Android Wear API 23, this has become even easier. Developers can put different layouts into layout-round and layout folders. Previously with WatchViewStub, developers needed to wait until the layout was inflated before attaching view elements, this added significant complexity to the code. This is eliminated using the -round identifier:


 Pre Android Wear API 23 - WatchViewStub (4 files)


1. layout/activity_main.xml

 xml version="1.0" encoding="utf-8"?>  
 
<android.support.wearable.view.WatchViewStub    
     xmlns
:android="http://schemas.android.com/apk/res/android"  
     xmlns
:app="http://schemas.android.com/apk/res-auto"  
     xmlns
:tools="http://schemas.android.com/tools"  
     android
:id="@+id/watch_view_stub"  
     android
:layout_width="match_parent"  
     android
:layout_height="match_parent"  
     app
:rectLayout="@layout/rect_activity_main"  
     app
:roundLayout="@layout/round_activity_main"  
     tools
:context="com.android.example.watchviewstub.MainActivity"  
     tools
:deviceIds="wear">android.support.wearable.view.WatchViewStub>

2. layout/rect_activity_main.xml - layout for square watches


3. layout/round_activity_main.xml - layout for round watches


4. MainAcitivity.java
  
 
protected void onCreate(Bundle savedInstanceState) {  
   
super.onCreate(savedInstanceState);  
   setContentView
(R.layout.activity_main);  
   
final WatchViewStub stub = (WatchViewStub) findViewById(R.id.watch_view_stub);  
   stub
.setOnLayoutInflatedListener(new WatchViewStub.OnLayoutInflatedListener() {  
     
@Override  
     
public void onLayoutInflated(WatchViewStub stub) {  
       mTextView
= (TextView) stub.findViewById(R.id.text);  
     
}  
   
});  
 
}  


 After Android Wear API 23 - layout-round (3 files)


1. layout-notround/activity_main.xml - layout for square watches


2. layout-round/activity_main.xml - layout for round watches


3. MainAcitivity.java

 protected void onCreate(Bundle savedInstanceState) {  
     
super.onCreate(savedInstanceState);  
     setContentView
(R.layout.activity_main);  
     mTextView
= (TextView) findViewById(R.id.text);    
 
}  


That said, since WatchViewStub is part of the Android Wear Support Library, if your current code uses it, it is not a breaking change and you can refactor your code at your convenience. In addition to the -round identifier, developers also use the -notround idenifier to separate resources. So why would you want to use it in place of the default layout? It’s a matter of style. If you have a mixture of layouts, you might consider organising layouts in this way:


  • layout/ - Layouts which works for both circular and square watches

  • layout-round/ and layout-notround/ - Screen shape specific layouts


An even better way to develop for round - values-round/dimens.xml


Maintaining multiple layout files is potentially painful. Each time you add a screen element, you need to go to all the layout files and add this. With mobile devices, you will usually only do this to specify different layouts for phones and tablets and rarely for different phone resolutions. For watches, unless your screen layout is significantly different between round and square (which is rare based on the applications I have seen thus far), you should consider using different dimens.xml instead.


As I experimented with the -round identifier, I found that the easiest way to build for round and square watches is actually by specifying values/dimens.xml and values-round/dimens.xml. By specifying different padding settings, I am able to create the following layout with the same layout.xml file and two dimens files - one for square and one for round. The values used suits this layout, you should experiment with different values to see what works best:


values-round/dimens.xml values/dimens.xml

  name="header_start_padding">36dp  
 
name="header_end_padding">22dp  
 
name="list_start_padding">36dp  
 
name="list_end_padding">22dp  

  name="header_start_padding">16dp  
 
name="header_end_padding">16dp  
 
name="list_start_padding">10dp  
 
name="list_end_padding">10dp  


Before API 23, to do the same would have involved a significant amount of boilerplate code manually specifying the different dimensions for all elements on the screen. With the -round identifier, this is now easy to do in API 23 and is my favourite way to build round / square layouts.


Don’t forget the chin!


Some watches have an inset (also know as a “chin”) in an otherwise circular screen. So how should you can you build a beautiful layout while keeping your code elegant? Consider this design:


activity_main.xml


 <FrameLayout  
   
...>  
   
<android.support.wearable.view.CircledImageView  
     android
:id="@+id/androidbtn"  
     android
:src="@drawable/ic_android"  
     
.../>  
   
<ImageButton  
     android
:id="@+id/lovebtn"  
     android
:src="@drawable/ic_favourite"  
     android
:paddingTop="5dp"  
     android
:paddingBottom="5dp"  
     android
:layout_gravity="bottom"  
     
.../>  
 
FrameLayout>  


If we are to do nothing, the heart shape button will disappear into the chin. Luckily, there’s an easy way to fix this with fitsSystemWindows:


android:id="@+id/lovebtn"  
     
android:src="@drawable/ic_favourite"  
     
android:paddingTop="5dp"  
     
android:paddingBottom="5dp"  
   
android:fitsSystemWindows="true"  
     ...
/>  


For the eagle-eyed (middle image of the screen shown below under “fitsSystemWindows=”true””), you might noticed that the top and bottom padding that we have put in is lost. This is one of the main side effect of using fitsSystemWindows. This is because fitsSystemWindows works by overriding the padding to make it fits the system window. So how do we fix this? We can replace padding with InsetDrawables:


inset_favourite.xml


xmlns:android="http://schemas.android.com/apk/res/android"  
   
android:drawable="@drawable/ic_favourite"
   
android:insetTop="5dp"  
   
android:insetBottom="5dp"
/>  


activity_main.xml


android:id="@+id/lovebtn"  
     
android:src="@drawable/inset_favourite"  
     
android:paddingTop="5dp"  
     
android:paddingBottom="5dp"  
     
android:fitsSystemWindows="true"  
     ...
/>  


Although the padding setting in the layout will be ignored, the code is tidier if we remove this redundant code.


Do nothing
fitsSystemWindows=”true”
and use InsetDrawable


If you require more control than what is possible declaratively using xml, you can also programmatically adjust your layout. To obtain the size of the chin you should attach a View.OnApplyWindowInsetsListener to the outermost view of your layout. Also don’t forget to call v.onApplyWindowInsets(insets). Otherwise, the new listener will consume the inset and inner elements which react to insets may not react.


How to obtain the screen chin size programmatically


MainActivity.java


 private int mChinSize;  
 
protected void onCreate(Bundle savedInstanceState) {  
     
super.onCreate(savedInstanceState);  
     setContentView
(R.layout.activity_main);  
     
// find the outermost element  
     
final View container = findViewById(R.id.outer_container);  
     
// attach a View.OnApplyWindowInsetsListener  
     
container.setOnApplyWindowInsetsListener(new View.OnApplyWindowInsetsListener() {  
         
@Override  
         
public WindowInsets onApplyWindowInsets(View v, WindowInsets insets) {  
             mChinSize
= insets.getSystemWindowInsetBottom();  
           
 // The following line is important for inner elements which react to insets  
             v.onApplyWindowInsets(insets);

             
return insets;  
     
}  
   
});  
 
}  


Last but not least, remember to test your code! Since last year, we have included several device images for Android Wear devices with a chin to make testing easier and faster:


Square peg in a round hole no more!


Android Wear has always been about empowering users to wear what they want. A major part in enabling this is the round screen. With API 23 and the -round resource identifier, it is easier than ever to build for both round and square watches - delightful experiences backed by beautiful code!


Additional Resources


Why would I want to fitsSystemWindows? by Ian Lake - Best practice for using this powerful tool including its limitations.
ScreenInfo Utility by Wayne Piekarski - Get useful information for your display including DPI, chin size, etc.

الاثنين، 1 فبراير 2016

Marshmallow and User Data


Posted by Joanna Smith, Developer Advocate and Giles Hogben, Google Privacy Team


Marshmallow introduced several changes that were designed to help your app look after user data. The goal was to make it easier for developers to do the right thing. So as Android 6.0, Marshmallow, gains traction, we challenge you to do just that.


This post highlights the key considerations for user trust when it comes to runtime permissions and hardware identifiers, and points you to new best practices documentation to clarify what to aim for in your own app.


Permission Changes


With Marshmallow, permissions have moved from install-time to runtime. This is a mandatory change for SDK 23+, meaning it will affect all developers and all applications targeting Android 6.0. Your app will need to be updated anyway, so your challenge is to do so thoughtfully.


Runtime permissions mean that your app can now request access to sensitive information in the context that it will be used. This gives you a chance to explain the need for the permission, without scaring users with a long list of requests.


Permissions are also now organized into groups, so that users can make an informed decision without needing to understand technical jargon. By allowing your users to make a decision, they may decide not to grant a permission or to revoke a previously-granted permission. So, your app needs to be thoughtful when handling API calls requiring permissions that may have been denied, and about building in graceful failure-handling so that your users can still interact with the rest of your app.


Identifier Changes


The other aspect of user trust is doing the right thing with user data. With Marshmallow, we are turning off access to some kinds of data in order to direct developers down this path.


Most notably, Local WiFi and Bluetooth MAC addresses are no longer available. The getMacAddress() method of a WifiInfo object and the BluetoothAdapter.getDefaultAdapter().getAddress() method will both return 02:00:00:00:00:00 from now on.


However, Google Play Services now provides Instance IDs, which identify an application instance running on a device. Instance IDs provide a reliable alternative to non-resettable, device-scoped hardware IDs, as they will not persist across a factory reset and are scoped to an app instance. See the Google Developer's What is Instance ID? help article for more information.


What’s Next


User trust depends largely on what users see and how they feel. Mishandling permissions and identifiers increases the risk of unwanted/unintended tracking, and can result in users feeling that your app doesn’t actually care about the user. So to help you get it right, we’ve created new documentation that should enable developers to be certain that their app is doing the right thing for their users.


So happy developing! May your apps make users happy, and may your reviews reflect that. :)


الأربعاء، 20 يناير 2016

Android Developer Story: Music app developer DJIT builds higher quality experiences and successful businesses on Android

Posted by Lily Sheringham, Google Play team


Paris-based DJiT is the creator of edjing, one of the most downloaded DJ apps in the world, it now has more than 60 million downloads and a presence in 182 countries. Following their launch on Android, the platform became the largest contributor of business growth, with 50 percent of total revenue and more than 70 percent of new downloads coming from their Android users.


Hear from Jean-Baptiste Hironde, CEO & Co-founder, Séverine Payet, Marketing Manager, and Damien Delépine, Android Software Engineer, to learn how DJit improved latency on new Android Marshmallow, as well as leveraged other Android and Google Play features to create higher quality apps.


Find out more about building great audio apps and how to find success on Google Play.

الاثنين، 26 أكتوبر 2015

New in Android Samples: Authenticating to remote servers using the Fingerprint API

Posted by Takeshi Hagikura, Yuichi Araki, Developer Programs Engineer


As we announced in the previous blog post, Android 6.0 Marshmallow is now publicly available to users. Along the way, we’ve been updating our samples collection to highlight exciting new features available to developers.


This week, we’re releasing AsymmetricFingerprintDialog, a new sample demonstrating how to securely integrate with compatible fingerprint readers (like Nexus Imprint) in a client/server environment.


Let’s take a closer look at how this sample works, and talk about how it complements the FingerprintDialog sample we released earlier during the public preview.


Symmetric vs Asymmetric Keys


The Android Fingerprint API protects user privacy by keeping users’ fingerprint features carefully contained within secure hardware on the device. This guards against malicious actors, ensuring that users can safely use their fingerprint, even in untrusted applications.


Android also provides protection for application developers, providing assurances that a user’s fingerprint has been positively identified before providing access to secure data or resources. This protects against tampered applications, providing cryptographic-level security for both offline data and online interactions.


When a user activates their fingerprint reader, they’re unlocking a hardware-backed cryptographic vault. As a developer, you can choose what type of key material is stored in that vault, depending on the needs of your application:


  • Symmetric keys: Similar to a password, symmetric keys allow encrypting local data. This is a good choice securing access to databases or offline files.

  • Asymmetric keys: Provides a key pair, comprised of a public key and a private key. The public key can be safely sent across the internet and stored on a remote server. The private key can later be used to sign data, such that the signature can be verified using the public key. Signed data cannot be tampered with, and positively identifies the original author of that data. In this way, asymmetric keys can be used for network login and authenticating online transactions. Similarly, the public key can be used to encrypt data, such that the data can only be decrypted with the private key.


This sample demonstrates how to use an asymmetric key, in the context of authenticating an online purchase. If you’re curious about using symmetric keys instead, take a look at the FingerprintDialog sample that was published earlier.


Here is a visual explanation of how the Android app, the user, and the backend fit together using the asymmetric key flow:


1. Setting Up: Creating an asymmetric keypair


First you need to create an asymmetric key pair as follows:


KeyPairGenerator.getInstance(KeyProperties.KEY_ALGORITHM_EC, "AndroidKeyStore");
keyPairGenerator.initialize(
new KeyGenParameterSpec.Builder(KEY_NAME,
KeyProperties.PURPOSE_SIGN)
.setDigests(KeyProperties.DIGEST_SHA256)
.setAlgorithmParameterSpec(new ECGenParameterSpec("secp256r1"))
.setUserAuthenticationRequired(true)
.build());
keyPairGenerator.generateKeyPair();


Note that .setUserAuthenticationRequired(true) requires that the user authenticate with a registered fingerprint to authorize every use of the private key.

Then you can retrieve the created private and public keys with as follows:


KeyStore keyStore = KeyStore.getInstance("AndroidKeyStore");
keyStore.load(null);
PublicKey publicKey =
keyStore.getCertificate(MainActivity.KEY_NAME).getPublicKey();

KeyStore keyStore = KeyStore.getInstance("AndroidKeyStore");
keyStore.load(null);
PrivateKey key = (PrivateKey) keyStore.getKey(KEY_NAME, null);


2. Registering: Enrolling the public key with your server


Second, you need to transmit the public key to your backend so that in the future the backend can verify that transactions were authorized by the user (i.e. signed by the private key corresponding to this public key).
This sample uses the fake backend implementation for reference, so it mimics the transmission of the public key, but in real life you need to transmit the public key over the network.


boolean enroll(String userId, String password, PublicKey publicKey);


3. Let’s Go: Signing transactions with a fingerprint


To allow the user to authenticate the transaction, e.g. to purchase an item, prompt the user to touch the fingerprint sensor.


Then start listening for a fingerprint as follows:


Signature.getInstance("SHA256withECDSA");
KeyStore keyStore = KeyStore.getInstance("AndroidKeyStore");
keyStore.load(null);
PrivateKey key = (PrivateKey) keyStore.getKey(KEY_NAME, null);
signature.initSign(key);
CryptoObject cryptObject = new FingerprintManager.CryptoObject(signature);

CancellationSignal cancellationSignal = new CancellationSignal();
FingerprintManager fingerprintManager =
context.getSystemService(FingerprintManager.class);
fingerprintManager.authenticate(cryptoObject, cancellationSignal, 0, this, null);


4. Finishing Up: Sending the data to your backend and verifying


After successful authentication, send the signed piece of data (in this sample, the contents of a purchase transaction) to the backend, like so:


Signature signature = cryptoObject.getSignature();
// Include a client nonce in the transaction so that the nonce is also signed
// by the private key and the backend can verify that the same nonce can't be used
// to prevent replay attacks.
Transaction transaction = new Transaction("user", 1, new SecureRandom().nextLong());
try {
signature.update(transaction.toByteArray());
byte[] sigBytes = signature.sign();
// Send the transaction and signedTransaction to the dummy backend
if (mStoreBackend.verify(transaction, sigBytes)) {
mActivity.onPurchased(sigBytes);
dismiss();
} else {
mActivity.onPurchaseFailed();
dismiss();
}
} catch (SignatureException e) {
throw new RuntimeException(e);
}


Last, verify the signed data in the backend using the public key enrolled in step 2:


@Override
public boolean verify(Transaction transaction, byte[] transactionSignature) {
try {
if (mReceivedTransactions.contains(transaction)) {
// It verifies the equality of the transaction including the client nonce
// So attackers can't do replay attacks.
return false;
}
mReceivedTransactions.add(transaction);
PublicKey publicKey = mPublicKeys.get(transaction.getUserId());
Signature verificationFunction = Signature.getInstance("SHA256withECDSA");
verificationFunction.initVerify(publicKey);
verificationFunction.update(transaction.toByteArray());
if (verificationFunction.verify(transactionSignature)) {
// Transaction is verified with the public key associated with the user
// Do some post purchase processing in the server
return true;
}
} catch (NoSuchAlgorithmException | InvalidKeyException | SignatureException e) {
// In a real world, better to send some error message to the user
}
return false;
}


At this point, you can assume that the user is correctly authenticated with their fingerprints because as noted in step 1, user authentication is required before every use of the private key. Let’s do the post processing in the backend and tell the user that the transaction is successful!


Other updated samples


We also have a couple of Marshmallow-related updates to the Android For Work APIs this month for you to peruse:


  • AppRestrictionEnforcer and AppRestrictionSchema
    These samples were originally released when the App Restriction feature was introduced as a part of Android for Work API in Android 5.0 Lollipop. AppRestrictionEnforcer demonstrates how to set restriction to other apps as a profile owner. AppRestrictionSchema defines some restrictions that can be controlled by AppRestrictionEnforcer. This update shows how to use 2 additional restriction types introduced in Android 6.0.


  • We hope you enjoy the updated samples. If you have any questions regarding the samples, please visit us on our GitHub page and file issues or send us pull requests.

    الثلاثاء، 29 سبتمبر 2015

    Android 6.0 Marshmallow coming to devices soon

    Posted by, Dave Burke, VP of Engineering, Android


    Starting next week, Android 6.0 Marshmallow will begin rolling out to supported Nexus devices around the world, including Nexus 5, Nexus 6, Nexus 7 (2013), Nexus 9, Nexus Player, and Android One. At the same time, we’ll be pushing the Android 6.0 source to the Android Open Source Project (AOSP), which marks the official beginning of public availability.


    Today we also introduced two great new Nexus devices that will be among the first to run the Android 6.0 Marshmallow platform. These devices let your apps use the latest platform features and take advantage of the latest hardware optimizations from our partners. Let’s take a look at how to make sure your apps look great on these new devices.


    Introducing Nexus 5X and Nexus 6P


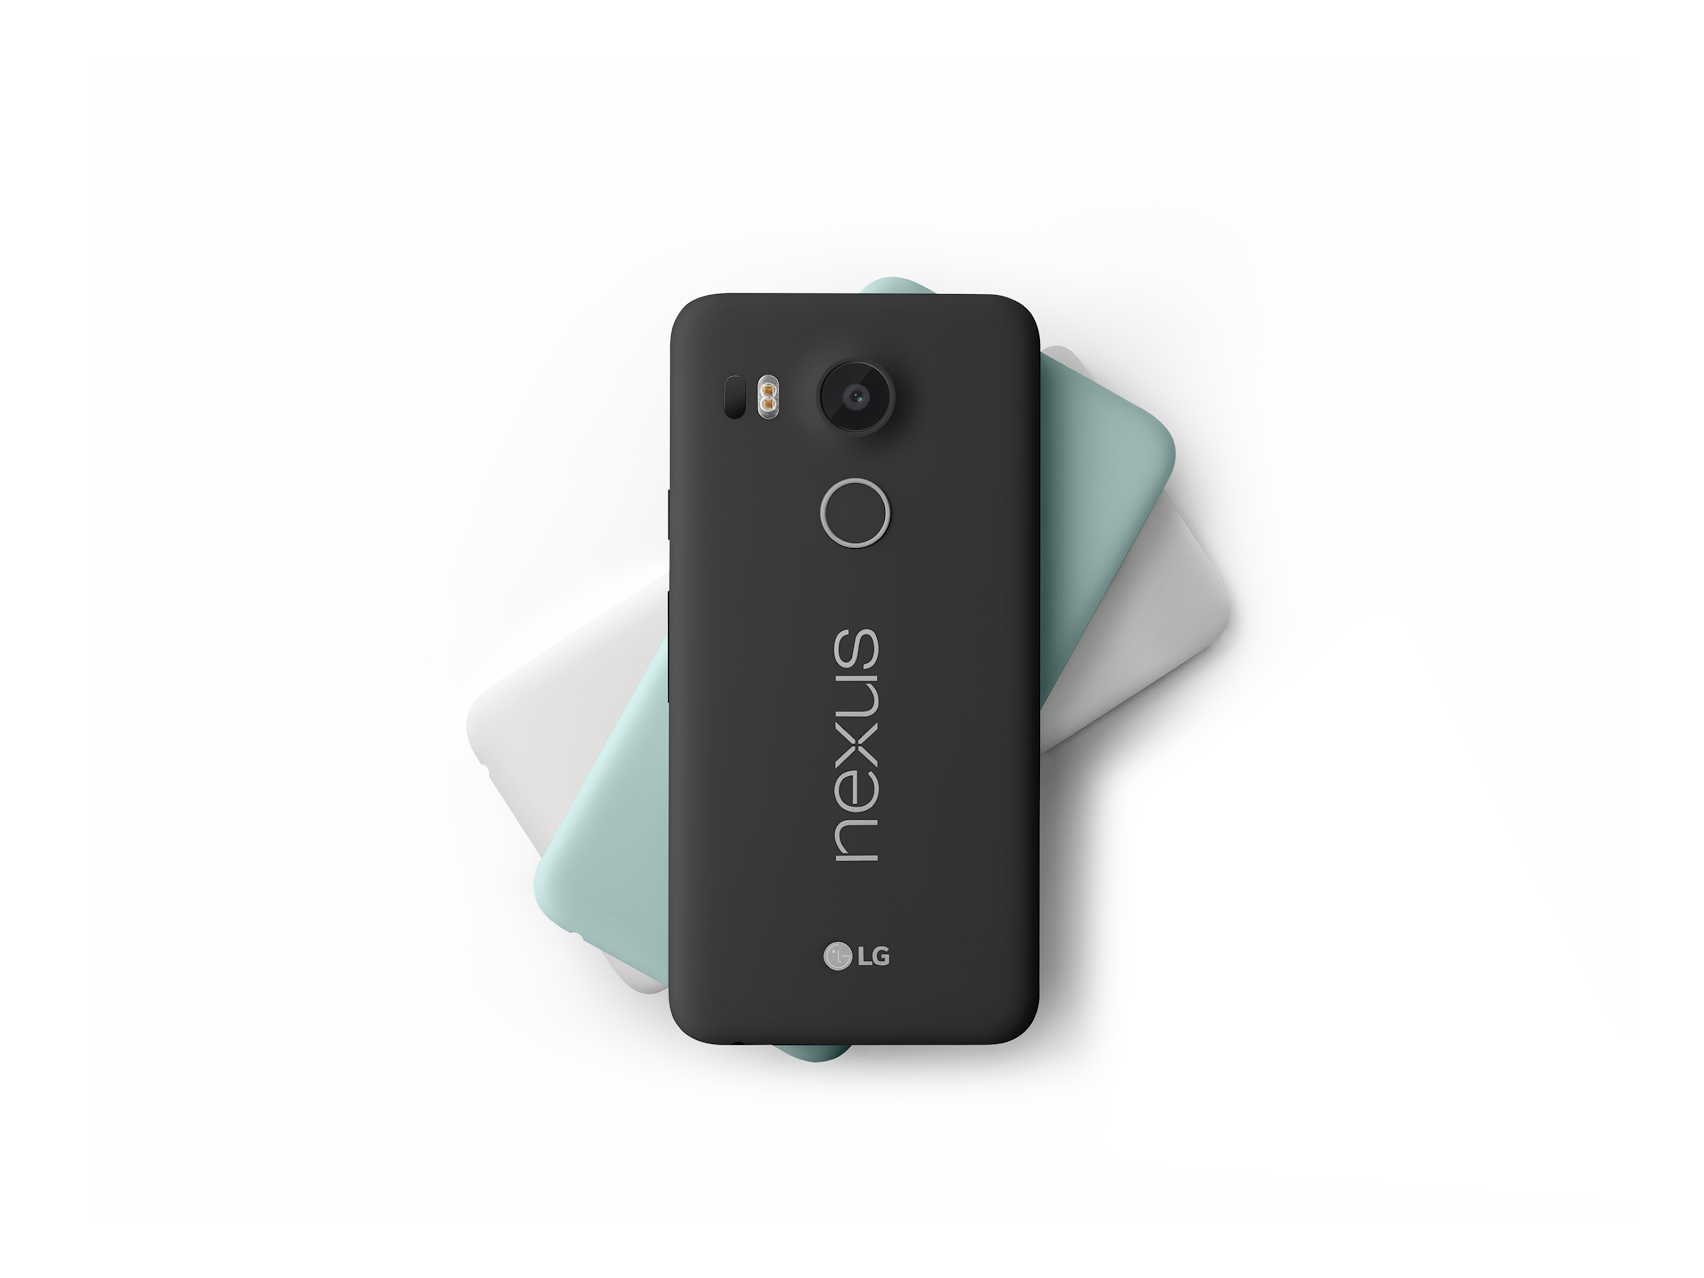
    Nexus 5X


    Nexus 6P


    The Nexus 5X is built in partnership with LG. It’s equipped with a 5.2-inch FHD LCD 1080p display, a Snapdragon™ 808 processor (1.8 GHz hexa-core, 64-bit), and a 12.3 MP rear camera. Offering top-line performance in a compact, lightweight device.


    The Nexus 6P, built in partnership with Huawei, has a 5.7-inch WQHD AMOLED display, Snapdragon™ 810 v2.1 processor (2.0 GHz octa-core 64-bit), front-facing stereo speakers, and a 12.3 MP rear camera, all housed in a diamond-cut aluminum body.


    Both devices have USB Type-C ports and fingerprint sensors, and include the latest hardware features for Android, such as: Android Sensor Hub, low-power Wi-Fi scanning with channel selection, batching, and BSSID hotlists, Bluetooth 4.2 with ultra low-power BLE notifications, and more.


    Get your apps ready


    Take some time to make sure your apps and games are ready to give your users the best mobile experience on these devices.


    Check your assets


    Resolution Screen size Density
    Nexus 5X 1920 x 1080 px
    (730 x 410 dp)
    normal 420 dpi
    Nexus 6P 2560 x 1440 px
    (730 x 410 dp)
    normal 560 dpi


    Nexus 5X has a quantized density of 420 dpi, which falls in between the xhdpi and xxhdpi primary density buckets. Nexus 6P has a density of 560 dpi, which falls in between the xxhdpi and xxxhdpi buckets. The platform will scale down any assets from a higher resolution bucket, but if those aren’t available, then it will scale up the assets from a lower-density bucket.


    For best appearance in the launcher, we recommend that you provide at least an xxxhdpi app icon because devices can display large app icons on the launcher.


    For the rest of your assets, you can consider using vector assets or optionally add versions for the next-higher density bucket. This provides a sharper visual experience, but does increase apk size, so you should make an appropriate decision for your app.


    Make sure you are not filtered on Google Play


    If you are using the element in your AndroidManifest.xml file, you should stop using it because it’s not scalable to re-compile and publish your app each time new devices come out. If you must use it, make sure to update your manifest to add a new configuration for Nexus 5X, since it uses a new density bucket (420). Otherwise, your app may be filtered from Google Play on these devices.


    Wrapping up M Developer Preview


    After three preview releases, and with the final OTA coming soon, it’s time to wrap up the Android M Developer Preview. The feedback you’ve provided has helped make Android 6.0 a great platform for apps and games. Developers in more than 200 countries have been using the Developer Preview to get their apps ready for Android 6.0 Marshmallow users everywhere.


    More developer resources


    If you haven’t taken a look at Android 6.0 Marshmallow yet, visit developer.android.com/mm for complete information about about what’s new for developers and important changes to plan for in your apps — runtime permissions, Doze and App Standby idle modes, Auto Backup for Apps, fingerprint support, and others.


    We’ve also produced a playlist of developer videos to help you get the most out of all the new features in Android 6.0 Marshmallow. Check it out below.


    Final testing and updates


    Now is the time to finish up testing and prepare for publishing. You can use the Developer Preview 3 system images for final testing until early October. After the Android 6.0 public release, you’ll be able to download final images from the Nexus factory images page, and final emulator images from Android Studio.


    Reminder: Devices flashed with an M Developer Preview build won’t receive the Android 6.0 update automatically. You’ll need to manually flash those devices to a public released image first.


    Upload your apps to Google Play


    When your apps are ready, you can update them to Google Play via the Developer Console on all release channels (Alpha, Beta & Production). For apps that target API level 23, Google Play will provide the new optimized download and autoupdate flow based on the runtime permissions model in Android 6.0. Give it a try!


    To make sure that your updated app runs well on Android 6.0 Marshmallow and older versions, we recommend that you use the newly improved beta testing feature on Google Play to get early feedback. You can then do a staged rollout as you release the new version to all users.


    What’s next?


    In mid-October, we’ll be turning down the M Developer Preview community and the M Developer Preview issue tracker. If you've filed bugs against the preview, and you'd like to keep these open against the Android 6.0 final builds, you can file a new issue in the AOSP issue tracker.


    Thanks to everyone who participated in the Android M Developer Preview. Let us know how this year’s preview met your needs by taking a short survey. Your feedback helps shape our future releases.


    الثلاثاء، 15 سبتمبر 2015

    New Android Marshmallow sample apps

    Posted by Rich Hyndman, Developer Advocate


    Three new Android Marshmallow sample applications have gone live this week. As usual they are available directly from the Google Samples repository on GitHub or through the Android Studio samples browser.


    Android Direct Share Sample


    Direct Share is a new feature in Android Marshmallow that provides APIs to make sharing more intuitive and quick for users. Direct Share allows users to share content to targets, such as contacts, within other apps. For example, the direct share target might launch an activity in a social network app, which lets the user share content directly to a specific friend in that app.


    This sample is a dummy messaging app, and just like any other messaging apps, it receives intents for sharing a plain text. It demonstrates how to show some options directly in the list of share intent candidates. When a user shares some text from another app, this sample app will be listed as an option. Using the Direct Share feature, this app also shows some of contacts directly in the chooser dialog.


    To enable Direct Share, apps need to implement a Service extending ChooserTargetService. Override the method onGetChooserTargets() and return a list of Direct Share options.


    In your AndroidManifest.xml, add a meta-data tag in your Activity that receives the Intent. Specify android:name as android.service.chooser.chooser_target_service, and point the android:value to the Service.


    Android MidiSynth Sample


    Android 6.0 introduces new support for MIDI. This sample demonstrates how to use the MIDI API to receive and play MIDI messages coming from an attached input device (MIDI keyboard).


    The Android MIDI API (android.media.midi) allows developers to connect a MIDI device to an Android device and process MIDI messages coming from it.


    This sample demonstrates some basic features of the MIDI API, such as:

    • Enumeration of currently available devices (including name, vendor, capabilities, etc)

    • Notification when MIDI devices are plugged in or unplugged

    • Receiving and processing MIDI messages


    It also contains a simple implementation of an oscillator and note playback.


    Android MidiScope Sample


    A sample demonstrating how to use the MIDI API to receive and process MIDI signals coming from an attached device.


    The Android MIDI API (android.media.midi) allows developers to connect a MIDI device to Android and process MIDI signals coming from it. This sample demonstrates some basic features of the MIDI API, such as enumeration of currently available devices (Information includes name, vendor, capabilities, etc), notification when MIDI devices are plugged in or unplugged, and receiving MIDI signals. This sample simply shows all the received MIDI signals to the screen log and does not play any sound for them.


    Check out a sample today and jumpstart your Android Marshmallow development.


    الخميس، 27 أغسطس 2015

    Building better apps with Runtime Permissions

    Posted by Ian Lake, Developer Advocate


    Android devices do a lot, whether it is taking pictures, getting directions or making phone calls. With all of this functionality comes a large amount of very sensitive user data including contacts, calendar appointments, current location, and more. This sensitive information is protected by permissions, which each app must have before being able to access the data. Android 6.0 Marshmallow introduces one of the largest changes to the permissions model with the addition of runtime permissions, a new permission model that replaces the existing install time permissions model when you target API 23 and the app is running on an Android 6.0+ device.


    Runtime permissions give your app the ability to control when and with what context you’ll ask for permissions. This means that users installing your app from Google Play will not be required to accept a list of permissions before installing your app, making it easy for users to get directly into your app. It also means that if your app adds new permissions, app updates will not be blocked until the user accepts the new permissions. Instead, your app can ask for the newly added runtime permissions as needed.


    Finding the right time to ask for runtime permissions has an important impact on your app’s user experience. We’ve gathered a number of design patterns in our new Permission design guidelines including best practices around when to request permissions, how to explain why permissions are needed, and how to handle permissions being denied.


    Ask up front for permissions that are obvious


    In many cases, you can avoid permissions altogether by using the existing intents system to utilize other existing specialized apps rather than building a full experience within your app. An example of this is using ACTION_IMAGE_CAPTURE to start an existing camera app the user is familiar with rather than building your own camera experience. Learn more about permissions versus intents.


    However, if you do need a runtime permission, there’s a number of tools to help you. Checking for whether your app has a permission is possible with ContextCompat.checkSelfPermission() (available as part of revision 23 of the support-v4 library for backward compatibility) and requesting permissions can be done with requestPermissions(), bringing up the system controlled permissions dialog to allow the user to grant you the requested permission(s) if you don’t already have them. Keep in mind that users can revoke permissions at any time through the system settings so you should always check permissions every time.


    A special note should be made around shouldShowRequestPermissionRationale(). This method returns true if the user has denied your permission request at least once yet have not selected the ‘Don’t ask again’ option (which appears the second or later time the permission dialog appears). This gives you an opportunity to provide additional education around the feature and why you need the given permission. Learn more about explaining why the app needs permissions.


    Read through the design guidelines and our developer guide for all of the details in getting your app ready for Android 6.0 and runtime permissions. Making it easy to install your app and providing context around accessing user’s sensitive data are key changes you can make to build better apps.